| MMv4 KB |
| Display your storefront in a Facebook Tab | |
| Last Edited - 08/12/2013 2:51pm PDT | |
| Category Path - Shopping Cart Software Components > Administration Area > Modules > 3rd Party Service Integration > FAQs & Tutorials | |
| This tutorial will explain how to display your Modular Merchant shopping cart storefront, allow customers to shop and place orders all directly within your Facebook page. The entire shopping experience, from start to finish, can take place without the customer ever leaving your Facebook page. All orders generated in this way will still be listed in your store's administration area, just like orders placed on your regular website.
warning Note that some of the instructions in this tutorial need to be performed on the Facebook website. Facebook moves or makes changes to their system and its documentation from time to time. As such, we can't guarantee the accuracy of the instructions below that take place on the Facebook website. For the most up-to-date instructions for managing tools on the Facebook website, please refer to Facebook's own documentation.
Step 1: Create a Facebook App on the Facebook Website
To integrate your storefront into your Facebook page, you will need to create an "App" for it within Facebook. To do so, follow these steps.
reference This information is also available on Facebook's website at http://developers.facebook.com/docs/guides/canvas/#tabs
Locating Facebook App Integration Information
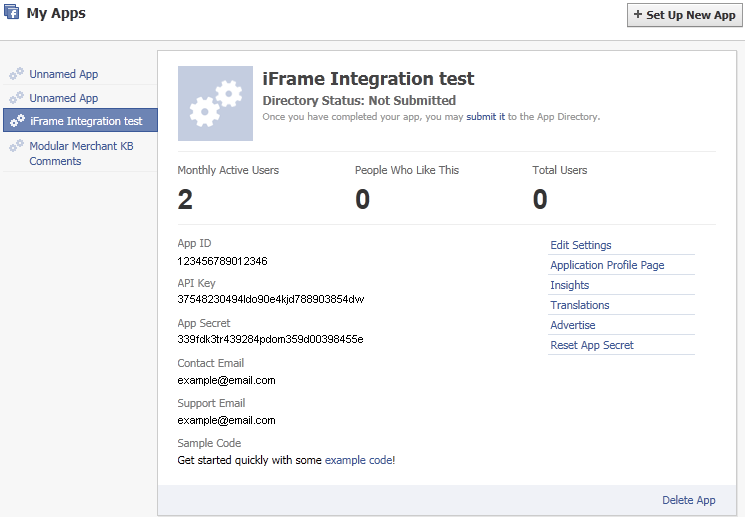
Once your Facebook app has been created, return to the My Apps page and locate the app you have just created. On the app's info page, record the App ID, API Key and App Secret ID numbers. This information can be found on a page that looks something like the example below. Hang on to this information for a minute, you'll need to enter it into your Modular Merchant shopping cart's administration area in an upcoming step.
Add your App to your Facebook Page
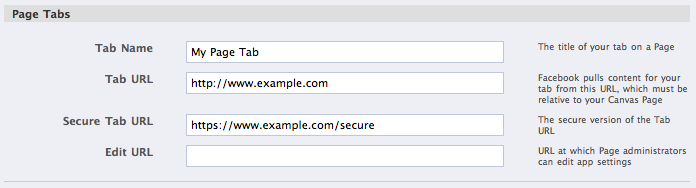
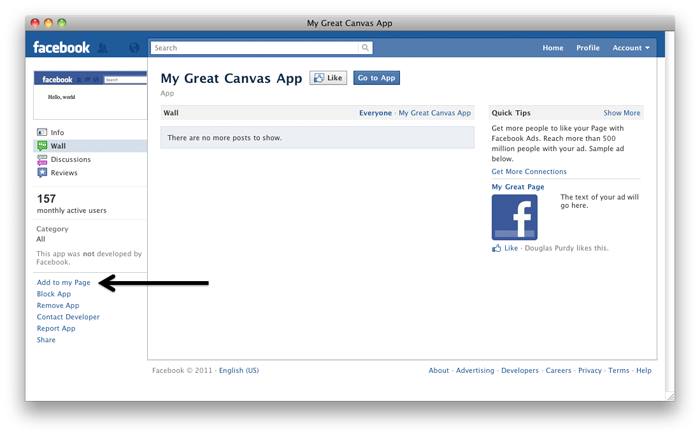
The last step that takes place on the Facebook website is to add a link to your new app to your Facebook page. An administrator of your Facebook page can add your app directly to the page by navigating to your app's Profile Page and selecting the Add to my Page option.
Step 2: Add your Facebook App Info to your Store
Once the app has been created and added to your Facebook page, you'll need to record its vital details into your store. This will allow your storefront and Facebook to find each other. To integrate the two together, follow these steps:
|
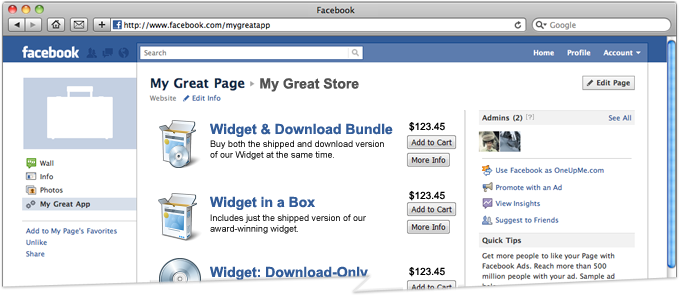
 Then, when a user navigates to the Facebook page, they will a link to the new tab that will display your storefront listed in your page's list of links on the left-side of the page.