| MMv4 KB |
| Select/Upload Images | |
| Last Edited - 02/5/2013 1:16pm PST | |
| Category Path - Shopping Cart Software Components > Administration Area > Design | |
| Store graphics such as product images, category images, and other website images can be uploaded using the Select/Upload Images tool. There are 3 options for uploading images:
image formats
Image files must be in a .png, .gif, .jpg, or .jpeg format.
JPEG files can be saved with either .jpg or .jpeg file extensions. Both file extensions are accepted by the shopping cart software for JPEG image files. The Upload Images tool can be accessed from a number of locations in the admin area, such as the Product Editor, Vendor Editor, and Category Editor pages. It can also be accessed directly by going to Design > Upload Store Graphics.
Options and settings of the Select/Upload Images tool
Upload image or zip file / Enter the image's URL / Use an existing image The first option of the Select/Upload Images tool is a dropdown menu to choose between uploading files from the local computer, importing an image from elsewhere on the internet, or using an existing image.
tip: uploading images in different browsers
In Firefox and Internet Explorer, the Select/Upload Images window includes a button labelled Browse... In Chrome, the Browse... button is replaced by the Choose Files button.
 In Firefox and Internet Explorer, the button is labelled Browse... and is located to the right of the text field that will display the filename once a file has been selected.  In Chrome, the button is labelled Choose Files and is located to the left of the text field that will display the filename once a file has been selected. Clicking the Browse... (or Choose Files) button will open a new file browser window to explore and select files on the local computer. In Firefox, the file browser window will be titled File Upload. When using Internet Explorer, the file browser window will be titled Choose File to Upload. And in Chrome, the file browser window will be titled Open. The file browser includes a navigation pane to locate and select files, as well as a text field titled File name, a dropdown menu that defaults to All Files, a button labelled Open, and a button labelled Cancel. To select a file to upload, click on the file in the navigation pane of the file browser window. This will add the file's name to the File name text field. Then click the Open button to close the file browser and return to the Select/Upload Images window. The selected filename will now be displayed in the Select/Upload Images window, next to the Browse... (or Choose Files) button. The following settings may be adjusted before or after selecting a file to upload, and before uploading the file. How should duplicates be handled? Select Replace the original image with the new one to overwrite any files with the same name in the destination directory. Select Keep the original image (The new one will be ignored) if you'd like to avoid overwriting any existing images with the same file name. Select save location A dropdown menu with the image directories currently present in the store will be available. Either select an existing one, or select Save to a NEW Image Directory... to create a new one (be sure to input a name for the new image directory) and insert the image(s) there. Create "thumbnail" images Use the checkboxes to automatically create additional images in the specified sizes. Either select pixels wide or percent of original. note Typically, the thumbnail versions are used with product images. By default:
Once the above settings have been adjusted, the image(s) may be uploaded.
Upload single image
To upload a single image:
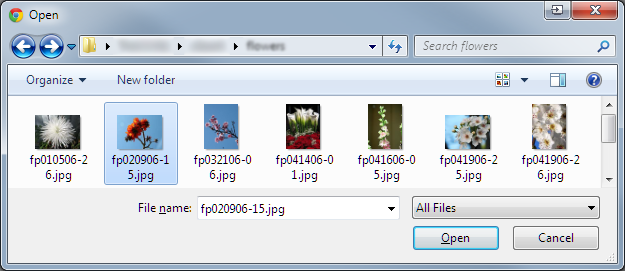 In the file browser window, locate the file to be uploaded, and click on the file to select it. Once a file has been selected, its name will be displayed in the File name text field. Click the Open button to close the file browser window and return to the Select/Upload Images window. It is also possible to directly specify the URL of the graphic. The system will make a copy of the image in your store's image directory. To use this option, select Enter the image's URL.
Upload multiple images in a zip file
To upload a zip file containing multiple images:
Upload multiple files sequentially
To upload multiple files sequentially:
Upload multiple files simultaneously
To upload multiple files simultaneously:
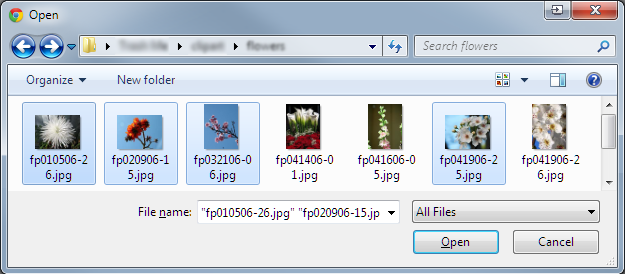 In the file browser window, locate a file to be uploaded, and click on the file to select it. While holding down the Ctrl key, click on the additional files to be uploaded. Once the files have been selected, their names will be displayed in the File name text field. Click the Open button to close the file browser window and return to the Select/Upload Images window. |
![[ + ]](img/articles/plus.png) (plus) button, a
(plus) button, a ![[ - ]](img/articles/minus.png) (minus) button, and a browse button (that may be labelled Browse... or Choose Files). Clicking the browse button will open a new window to locate and select files on the local computer. Once a file has been selected, the filename will be added to the non-interactive text field to the right of Upload image or zip file. The plus and minus buttons may be used to add or remove additional rows of upload options.
(minus) button, and a browse button (that may be labelled Browse... or Choose Files). Clicking the browse button will open a new window to locate and select files on the local computer. Once a file has been selected, the filename will be added to the non-interactive text field to the right of Upload image or zip file. The plus and minus buttons may be used to add or remove additional rows of upload options.