For an overview of all of the membership management options that are available in Modular Merchant, be sure to start with the Introduction to Creating Members-Only Websites.
Modular Merchant's Subscription Product system (also called recurring billing or a continuity program) makes it simple to set up a "members-only" area on your website where your customers can log in to access content that they have purchased. When a customer purchases an eligible product, they will automatically gain access to the protected membership area on your website. Anyone who has not purchased that product won't have access to the website!

The shopping cart software offers two different ways that you can provide members-only content to your customers: You can either use the store's built-in members area, or add a membership area to your own website. This article is a tutorial on doing the latter: adding a password protected members-only area to your own website.
Prerequisites
This tutorial assumes the reader has:
-
A basic understanding of how to build a webpage; including working with HTML, creating links, tables, styles and images.
-
At least a basic familiarity with PHP or other programming language. (Any programming language can be used, but PHP is used in this tutorial.)
-
A hosted website that can run scripts either PHP or your programming language of choice.
-
Access to upload files to your website.
-
Modular Merchant Gold account plan or higher.
A tutorial on these prerequisites is outside the scope of this guide. However, if you require instruction on these items, many free resources and tutorials are available on the Internet, and a variety of books are available in the computer section of your local bookstore.
Here's some of the key terms that will be referred to in this article: key concept RMV: Stands for Remote Membership Validation. It's the name of the system used by the shopping cart software that validates a customer's attempt to log in to the members-only section of your website.
Member: A customer of your store who has either placed an order in the past, or has a subscription to a product to be billed in the future.
Order: A shopping cart transaction that has been placed in the past. Orders are listed in your store's Administration Area at: [Orders > Search Orders].
Subscription: A shopping cart transaction that is scheduled to be processed on a future date. Subscriptions are listed in your store's Administration Area at: [Orders > Search Subscription Queue].
What will I be building in this tutorial?
In this tutorial, I will explain the steps necessary to add a membership area to my website. The membership area will consist of two pages: a login page and a content page. The customer will enter the membership area through the login page and then move on to the content page.
The login form will use the Modular Merchant shopping cart software's RMV system to validate the attempts to access the members-only website. I will provide an example of how to evaluate the response returned from the RMV system, and then either allow or deny the customer's website access.
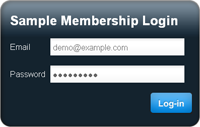
a sample rmv login form
Let's get started!
Building the login page
|
The membership area will require an entry page with a login form. The customer will enter the email address and password associated with their Customer Account from the shopping cart software.
The login form is just a basic HTML form. It needs two "input" fields: an "email" field, and a "password" field. It will also need a "submit" button.
Here's an example of the bare minimum HTML code for the login form:
|
 |
 |
code <form action="my_login_page.php" method="post" name="login_form">
Email: <input name="email" type="text" value="" />
Password: <input name="password" type="password" value="" />
<input name="submit" type="submit" value="Log In" />
</form>
Have the login form submit to the same page that contains it. For example, if the name of the web page containing my login form is "my_login_page.php", then the form's action should equal "my_login_page.php".
I now have a login form on my web page. But right now it just reloads that page when it is submitted. The next step is to add the functionality to have it contact the shopping cart software's RMV system to validate the customer's login attempt.
Configuring the remote subscription validation
Here's where we start adding some PHP code to the login page. There are several options available when using the RMV system. Before the login form will be able to verify the customer's login credentials, these options must be configured. This is done by adding some PHP variables to the very beginning of the login page's source code. These variables are:
reference $store_url
This will be set to the URL of your Modular Merchant shopping cart.
Example: http://www.MyShoppingCartURL.com/
$api_key
Your account's API Key is located at [Admin > System Settings].
Example: 9c1bc31d15sr23a22c9ba51d621a7b2fd
$results_format
This variable determines whether the store returns its validation results in either simple or XML format. Set this value to the desired format, either simple or xml.
Example: simple
$product_ids
Set this to a comma-separated list of the product SID (System ID) numbers of the products that must be present in either the customer's order history or subscription.
Example: 1,2,3
$all_any
If set to all, then the customer must be subscribed to all of the products set in the $product_ids variable.
If set to any, then the customer just needs to be subscribed to any one of the products set in the $product_ids variable.
Example: any
$subscription_vs_order
Set this to order to check for the required products in the orders the customer has already placed: their purchase history.
Set this to subscription to check for the required products in a subscription that is scheduled to be processed on a future date.
Example: subscription
$lookup_range
This determines how many days from today the RMV system will look for a qualifying product for the customer.
For example, if $subscription_vs_order is set to order and $lookup_range is set to 90, then the RMV system will look for a qualifying order placed by the customer within the last 90 days.
Or, if $subscription_vs_order is set to subscription and $lookup_range is set to 90, then the RMV system will look for a qualifying subscription for the customer that is due to be billed within the next 90 days.
Set the value of this variable to 0 (zero) to ignore it.
Example: 90
$require_order_authorization
The $require_order_authorization variable is only used when the $subscription_vs_order variable is set to order.
If set to Y or left blank, then only orders with a status of "payment authorized" will pass the RMV check.
If set to N, then the check of the orders' "payment authorized" status will be skipped.
Example: Y
$require_order_payment
The $require_order_payment variable is only used when the $subscription_vs_order variable is set to order.
If set to Y or left blank, then only orders with a status of "order paid" will pass the RMV check.
If set to N, then the check of the orders' "order paid" status will be skipped.
Example: Y
Here's an example of what the source code in my login web page where I set these PHP variables may look like:
code <?php
$store_url = 'http://www.MyShoppingCartURL.com';
$api_key = '9c1bc31d15sr23a22c9ba51d621a7b2fd';
$results_format = 'simple';
$product_ids = '1,2,3';
$any_all = 'any';
$subscription_vs_order = 'subscription';
$lookup_range = '90';
?>
Performing the remote membership validation
The next step is to contact the shopping cart software's RMV system when the form is submitted and validate the customer's membership status. To accomplish this, some additional PHP code will be needed. Fortunately, there's already an example of this code ready to use! Click here to download a sample file named "mm_membership_validator.php". All I'll need to do is include this membership validator file in our login page by adding this single line of code to the very beginning of the login page's source code:
code <?php include('mm_membership_validator.php'); ?>
The membership validator file contains the PHP code that will submit the login validation request to the shopping cart and then evaluate the cart's response. Advanced users that are comfortable editing PHP code may modify the contents of the mm_membership_validator.php file to further customize the login procedure.
The subscription validator will set a PHP variable named $is_membership_valid. Its value will be one of two things: It will be set to Y if the membership validation was successful, or N if it failed. The $is_membership_valid variable can then be used to log the customer in, which I'll add to the login page in a moment.
Saving the customer's login status in memory
Now that the customer's membership has been validated, I can work with the variable named $is_membership_valid to determine the status of the customer's login. If the variable equals "Y", then I know that the customer is eligible to access the members-only pages on my website. The next step then will be to have the website "remember" the value of the $is_membership_valid variable, so that the customer can travel from one secured page of my website to another, without needing to log back in on each page.
Saving the value of the variable into memory is easy. All I need to do save the value in PHP's user-session. This can be done with one line of code:
code <?php $_SESSION['is_membership_valid'] = $is_membership_valid; ?>
A new variable named $_SESSION['is_membership_valid'] has now been saved in PHP's "session" data. It contains the value of the $is_membership_valid variable, either "Y" or "N". PHP's session variables are special, because they are available on every .php page on the website, if the page's source code begins with:
code <?php session_start(); ?>
Redirecting the customer to the next page once they have logged in
Now that the customer is logged in, I will move them from the login page to the web page containing the "members-only" content. In this example, I have a second web page in my site's membership area called my_content_page.php. Now that the customer is logged in, I will redirect them to the content page with the following PHP code:
code <?php
if($_SESSION['is_membership_valid'] == 'Y') {
session_write_close();
header('location: my_content_page.php');
exit();
}
?>
What does this PHP code do? As you might expect, the "header" line redirects them to the new location of my_content_page.php, and the "exit" command tells it that there's nothing else to do after that. By "wrapping" the redirect within an "if" statement, the redirection only happens if the customer's login was successful. Once logged in, the customer will automatically be instantly redirected to my content page.
working with header redirects
Remember that PHP's header redirects like the example above must be the present in the page's source code before any other output.
This means that the PHP code performing the redirect must be placed before any HTML tags, text or other output — even any blank spaces!
If any content is displayed before the redirect, PHP will display a nice error message on the page for you instead of redirecting the user to the new location.
PHP Online Documentation:
http://php.net/manual/en/function.header.php
Putting together the pieces we have so far
Here's an example of what my entire my entire login web page's source code may look like:
code <?php
session_start();
$store_url = 'http://www.MyShoppingCartURL.com';
$api_key = '9c1bc31d15sr23a22c9ba51d621a7b2fd';
$product_ids = '1,2,3';
$any_all = 'any';
$subscription_vs_order = 'subscription';
include('mm_membership_validator.php');
$_SESSION['is_membership_valid'] = $is_membership_valid;
if($_SESSION['is_membership_valid'] == 'Y') {
session_write_close();
header('location: my_content_page.php');
exit();
}
?>
<form action="my_login_page.php" method="post" name="login_form">
Email: <input name="email" type="text" value="" />
Password: <input name="password" type="password" value="" />
<input name="submit" type="submit" value="Log In" />
</form>
Of course, you can get much more elaborate with the behavior of your own RMV login page. A sample RMV login page is available for download. The sample includes additional notes.
Protecting additional pages of my Membership Area
I can prevent unauthorized access to the content pages in the members-only section of my website by adding the following PHP code to the very beginning of each of those pages:
code <?php
session_start();
if($_SESSION['is_membership_valid'] != 'Y') {
session_write_close();
header('location: my_login_page.php');
exit();
}
?>
The code above will simply redirect the user back to the login page if the $_SESSION['is_membership_valid'] session variable has not yet been set to "Y". This forces the user to enter the site through the login page before accessing this or any other page containing this code snippet.
Logging the customer out
Logging a customer out of the Membership Area is a simple two-part process. First, create a link containing a variable that will flag the system to log the user out. This could be something like:
code <a href="my_login_page.php?logout=Y">Click here to log out.</a>
Note the "logout=Y" at the end of that link. That will pass a variable named "logout" with the value of "Y" when the user clicks the link. Next, on the my_login_page.php page, add the following code to actually perform the logout:
code <?php
if($_REQUEST['logout'] == 'Y') {
unset($_SESSION['is_membership_valid']);
}
?>
This will tell PHP that if there is a variable named "logout" with the value of "Y" present, then clear the $_SESSION['is_membership_valid'] session variable. Clearing this session variable will prevent the customer from accessing any of the protected content pages, until they log in again.
Displaying error messages
What if the user's attempt to login fails, due to incorrect user credentials, lack of membership, or other issue? It's possible to display any errors that are encountered during a login attempt.
A quick example of the code that could be used to display errors is:
code <?phpif(count($errors) > 0) {
echo('<p>The following errors were encountered when attempting to log in:</p>');
echo(implode('<br />', $errors));
}
?>
detailed information
By following the steps outlined in this tutorial, I have created a membership area on my website that is protected by a login, which is validated by my Modular Merchant shopping cart. The concept from this tutorial can be expanded on to protect an entire website. See the related articles for even more tips, ideas and suggestions!
|