|
quote
We want to offer our wholesale customers access to products typically unavailable to the average retail shopper. We would like these products to be viewable only by the wholesale customers. Can this be accomplished with Modular Merchant?
Absolutely! In this tutorial, we will go step by step through what is needed to provide a group of "wholesale" customers access to selected, normally unavailable products.
prerequisites
Article Overview
-
First, A customer attribute will be created, which is manually assigned to the specific wholesale customers.
-
Then, a customer group is created, that will contain customers with the newly created customer attribute.
-
Next, a custom category template will be created, that will only be viewable by members of the wholesale customer group.
-
After that, a custom product template will be created, that will only be viewable by members of the wholesale customer group.*
-
Once the templates are created, A specific product category will be created. The category will use the custom template that was just created. The special products that may only be purchased by wholesalers will be assigned to this wholesale category.
-
Finally, an event that provides the customers in that group with a discount on your wholesale products will be created.*
* Overview steps marked with an asterisk* may be optional.
please note
Examples involving the editing of HTML Templates within this article were referenced from the "athena" template package. The concepts remain true, but the exact examples may differ from template package to template package.
Creating the Customer Attribute
The customer attribute we will create is meant to show that the customer is a wholesale customer. This is what the Customer Group will recognize, and add the customer to the group. The attribute can be created through the following steps:
1. In your Administration Area, locate [Customers > Add a Customer Attribute].
2. For this example, for "Step 1: Select the Attribute Format..." we will select "Checkbox" from the dropdown menu.
3. Name the attribute, using the option "Attribute Title". The name title of the attribute will not affect anything, and may be named whatever you desire.
4. The "Public Description" and "Display Order" options are not necessary for this attribute.
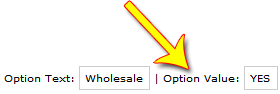
5. For the option "Checkbox Group Options", there are two fields; Option Text and Option Value. The Option Text is what will be displayed beside the selectable checkbox in the Customer Editor. The Option Value will be the value of the selection. The Option Value is what will be used in creating the customer group. What word(s) are used for the Text and Value are unimportant.
In this example, the "Option Text" will be "Wholesale"
and the "Option Value" will be "YES".
5. The "Default Value" option may be left blank.
6. The toggle button for "Active" must be toggled "YES".
7. You may optionally toggle the "Internal Only" option to "YES". This will ensure that the attribute is only displayed in the Administration Area, and never the storefront.
8. The options "Unique", "Required", "Strict", "Encrypt" and "Include in Email" may be ignored.
9. Click "Save Changes to this Customer Attribute".
Applying the customer attribute
You may now manually apply this attribute to your customers within the Customer Editor. To open the Customer Editor for a specific customer:
1. Locate [Customers > Search Customers], and click the SID number or edit button.
2. Under "Customer Attributes", select the checkbox for "Wholesale".
3. Click "Save Changes".
This attribute will need to be applied to your wholesale customers in order for them to view the contents of the wholesale category.
Creating the Customer Group
Now that the customer attribute has been created, we may move on to creating the customer group. The group will contain all of your customers who have the previously created attribute assigned to them within the Customer Editor. The group can be created through the following steps:
1. In your Administration Area, locate [Customers > Add a Customer Group].
2. Name the group, using the option "Group Name". The group may be named whatever you desire. For mine, I used "Wholesale Customers".
3. Keep "Is this Customer Group Active?" toggled "YES"
4. For the option "Only Active Customers", you may keep this set to "NO", or you may toggle it to "YES". This option will set whether or not the group will include customers who have an inactive status.
5. "How to apply rules below" may be set to either "match ANY of the rules below" or "match ALL of the rules below". This doesn't matter, as the group will only have one rule.
6. Under "Add a Rule to this Customer Group", the rule should be set up as follows:
rule
Type: Customer Account
Details: Wholesale (Customer Attribute) is YES
7. The "Notes" are used to record internal notes about the customer group. These notes are only viewable by store administrators.
8. Click "Save Changes".
9. Once the page has been saved, it will reload. Upon reload, under "Customer Group Rules", it will display the rule and all customers belonging to the group.
Three customers belong to this Customer Group.
tip
After the new customer group has been saved, the page will reload, and an SID number will now be assigned to the customer group. The SID number will be displayed for Option 1 SID (System ID). For example, my Customer Group SID is "123". Make note of the SID number, as it will be needed later.
Populating your template package
If they aren't already, the " category.tpl" and " product.tpl" templates will need to be populated into your template package. This will give you access to editing these templates directly. To do so:
1. In your Administration Area, locate [Design > Template Package Sandbox].
2. Select the desired template package from the dropdown menu.
3. In the Template Package Options row, click Populate Templates. The populate tool may be used to add one or more missing templates to a template package. Templates that are missing from the package are listed in black text. Templates that are already present in the template package are listed in red text.
warning
If the Populate tool is used to generate a template that is already present in the template package, the template will be replaced by its default version.
4. Locate "category.tpl" and "product.tpl", then click their associated checkboxes.
5. Click "Populate Selected Templates".
Creating the Custom Category Template
Now that the templates have been populated into your template package, we may move on to creating the custom category template. The custom category template will utilize the {IF-CUSTOMER-IN-GROUP-BEGIN:X} and {IF-CUSTOMER-IN-GROUP-END} QuickCode Tags; making it viewable only by customers within a specific group.
1. In your Administration Area, locate [Design > Template Package Sandbox].
2. Select the desired template package from the dropdown menu.
3. Under Template Package Files, select category.tpl. This will open it in the Template Editor.
3. If the Plain Text Editor is not currently being viewed, click the " Switch to Plain Text Editor" link in the top right of the Template Editor menu.
4. Next we will implement the {IF-CUSTOMER-IN-GROUP-BEGIN:123} and {IF-CUSTOMER-IN-GROUP-END} tags. The parameter at the end of the BEGIN tag will specify which customer group SID may view the content between the tags. Replace "123" with the SID number of the customer group.
example
To hide everything on the page presented after the category name, description and image:
Locate the text " This category contains", and insert {IF-CUSTOMER-IN-GROUP-BEGIN:123} right before the start of the phrase.
(Replace "123" with the correct Customer Group SID number)
Then, locate the text " <!-- Google Analytics code -->", and nsert {IF-CUSTOMER-IN-GROUP-END} right before the start of the phrase.
warning
Examples provided were from the default version of the "athena" template package. The concept of using the QuickCode Tags remains the same, but the examples may differ from other template packages.
5. The {ELSE} QuickCode Tag can be used with any QuickCode Tags that contain an "IF" or "!IF" statement. Using the {ELSE} tag will cause whatever is displayed between the {ELSE} tag and the END tag, to only be displayed if the original condition was not met.
Using the {ELSE} tag, it would be possible to display a message to be viewed by customers who are not in the wholesale group. This works by inserting the {ELSE} tag immediately before the {IF-CUSTOMER-IN-GROUP-END} tag. In between the two tags, you may leave your message.
example
{IF-CUSTOMER-IN-GROUP-BEGIN:123}
Content here will appear to customers in the specified group.
{ELSE}
This message appears to customers who are not in the group.
{IF-CUSTOMER-IN-GROUP-END}
When the {ELSE} tag and the message are inserted right before the END tag, customers who are not in the wholesale group will view the message. Wholesale customers will not view the message, but will see the rest of the contents between the BEGIN/END tags.
6. Under " File Options", select " Save as a copy...". This will bring up a field to enter a new template name. Enter the template name following the instructions given below the field, and click " Save Changes".
Creating the Custom Product Template
may be optional
This step may be optional depending on your store setup. If the wholesale products are regularly accessible products, but wholesale customers receive a discount on them, then this step may be ignored.
If the wholesale products are products specific to wholesale customers, that are unavailable to the average retail customer, then this step is required.
Similar to the custom category template that needed to be created, the same will need to be done for a custom product template. The custom product template will utilize the {IF-CUSTOMER-IN-GROUP-BEGIN:123} and {IF-CUSTOMER-IN-GROUP-END} QuickCode Tags; making its contents viewable only by customers within a specific group. This template will be assigned to each of your wholesale products within the Product Editor, so the contents of the product's page will not be viewable unless your customers are in a specific customer group. This can be done by:
1. In your Administration Area, locate [Design > Template Package Sandbox].
2. Select the template package from the dropdown menu.
3. Under Template Package Options, select " product.tpl". This will open it in the Template Editor.
4. If the Plain Text Editor is not currently being viewed, click the " Switch to Plain Text Editor" link in the top right of the Template Editor menu.
5. Next we will implement the {IF-CUSTOMER-IN-GROUP-BEGIN:123} and {IF-CUSTOMER-IN-GROUP-END} tags. The parameter at the end of the BEGIN tag will specify which customer group SID may view the content between the tags. Replace "123" with the SID number of the customer group.
example
To hide everything on the page presented after the product breadcrumb links:
Locate " {PRODUCT-BREADCRUMB-LINKS}</span>", and insert {IF-CUSTOMER-IN-GROUP-BEGIN:123} immediately after.
(Replace "123" with the correct Customer Group SID number)
Then, locate " {IF-RELATED-PRODUCT-END}" and insert {IF-CUSTOMER-IN-GROUP-END} immediately after.
warning
Examples provided were from the default version of the "athena" template package. The concept of using the QuickCode Tags remains the same, but the examples may differ from other template packages.
6. The {ELSE} QuickCode Tag can be used with any QuickCode Tags that contain an "IF" or "!IF" statement. Using the {ELSE} tag will cause whatever is displayed between the {ELSE} tag and the END tag, to only be displayed if the original condition was not met.
Using the {ELSE} tag, it would be possible to display a message to be viewed by customers who are not in the wholesale group. This works by inserting the {ELSE} tag immediately before the {IF-CUSTOMER-IN-GROUP-END} tag. In between the two tags, you may leave your message.
example
{IF-CUSTOMER-IN-GROUP-BEGIN:123}
Content here will appear to customers in the specified group.
{ELSE}
This message appears to customers who are not in the group.
{IF-CUSTOMER-IN-GROUP-END}
When the {ELSE} tag and the message are inserted right before the END tag, customers who are not in the wholesale group will view the message. Wholesale customers will not view the message, but will see the rest of the contents between the BEGIN/END tags.
7. Under " File Options", select " Save as a copy...". This will bring up a field to enter a new template name. Enter the template name following the instructions given below the field, and click " Go".
Creating the Category
Now we need to create the wholesale category. This category will use the new template we just created. To do this:
1. In your Administration Area, locate [Products > Add a Category].
2. Enter a name for the category, using the "Name" option.
3. For the "Template" option, select the newly created category template from the dropdown menu. It should have the prefix "category." and suffix ".tpl", for a result of something along the lines of "category._________.tpl".
4. Under the section "Add Products to this Category", you may enter a comma separated list of Product SID numbers, or use the Search tool to locate them.
5. Click "Save All".
tip
To ensure that this category is the only place your selected, wholesale products are viewable, it is recommended to set the option "Featured Product" to "NO" within the Product Editor for each wholesale product. This will keep the product(s) off the main storefront page.
Creating the Event
may be optional
This step may be optional depending on your store setup. If the wholesale products are products specific to wholesale customers, that are unavailable to the average retail customer, then this step may be ignored.
If the wholesale products are regularly accessible products, but wholesale customers receive a discount on them, then this step is required.
Once the customer attribute and group have both been created, it is time to create the event that provides the discount. The event can be created through the following steps:
1. In your Administration Area, locate [Modules > Event Engine > Add an Event].
2. Enter a name for the event, using the "Event Name" option.
3. Set "Reusable" to "YES".
4. Under "Add a Trigger to this Event", set the trigger as follows:
trigger
Type: customer
Details: The customer is in the Customer Group SID 123
(Replace "123" with the correct Customer Group SID number)
5. Under "Add a result to this Event", set the result as follows:
result
Type: product pricing
Details: The price of products in category SID 456 is decreased 45 percent
(Replace "456" with the correct Category SID number)
6. Click "Save Changes to this Event"
Summary
After the steps above have been completed, you have the ability to define which of your customers are wholesale customers, and have made it possible for them to view wholesale products without revealing the contents to the general public.
|