|
Add a Content Slideshow to your storefront
Modular Merchant's shopping cart software makes it quick and simple to add a slideshow of images to your storefront. This article will provide instructions on how to create and customize a slideshow in your online store.
First off, what will the slideshow look like in the storefront? It can contain between 1-5 images. These images can be any that you upload. When viewed in the storefront, the slideshow will also include:
-
A timer in the upper-right corner of each image, showing how much time is left until the next slide is loaded.
-
Left and right arrow buttons, to manually load the previous/next slides.
-
"Bullet" navigation below the slides, showing which slide the user is currently viewing, and allowing them to jump directly to any slide.
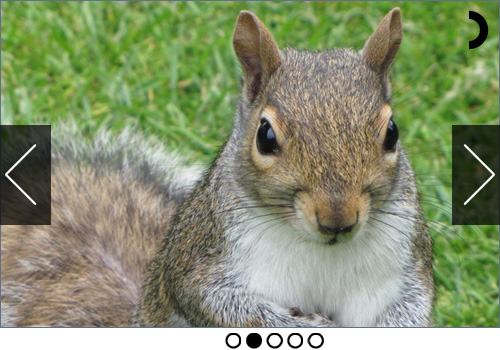 A sample screenshot of what the slideshow looks like. Not an actual slideshow.
(I know, we wanted to see more squirrels too.)
Upload images in the System Settings
The first step to creating your slideshow will be to upload the images it will contain. Options for uploading up to five images for the slideshow are located in the Display Settings section of the System Settings at: [Admin > System Settings].
 The Storefront Banner System Settings can be used to upload the images that will be used in the Content Slideshow.
Images can be uploaded in .gif, .jpg or .png format.
image sizes
For best results, all of the images used in the slideshow should be the same width and height. If not, the slideshow's content may be cropped to the size of the first image.
After all of the desired images have been uploaded using the System Settings interface, the slideshow will be ready to use. The next step is to simply tell the shopping cart which page(s) in your storefront you want to display the slideshow on. This is done by adding a QuickCode Tag to the desired location in your store templates.
Displaying the Content Slideshow in your storefront
As you know, each page of your public storefront — where your customers come to shop and frolic — has a corresponding HTML template that controls its design.
Each storefront page has its own template: the store's home page has one, the search page has one, the checkout page has one, etc.
The slideshow can be added to any storefront page by adding the followingQuickCode Tag to the desired location on that page's template: {CONTENT-SLIDESHOW}.
The slideshow will be inserted into a page wherever that QuickCode Tag is located within that page's HTML template.
the universe: no assembly required
Most of the Template Packages created by Modular Merchant will already include the { CONTENT-SLIDESHOW} QuickCode Tag on the template for the storefront's home page. In that case, no further customization of templates is necessary.
Also, if you're using the Universal Template system (which allows you to use just one single template to control the design of every page of your storefront) then this QuickCode Tag is already in place on your storefront's home page and is ready to use.
It's not necessary to edit any templates to add this feature if you're using a Universal set of templates.
In summary, a content slideshow can be added to any page in your online store simply by:
-
uploading one or more images in the System Settings area, and then
-
adding the {CONTENT-SLIDESHOW} QuickCode Tag to the desired location on those pages.
And step 2 may not even be necessary, if using one of the pre-made templates provided by Modular Merchant.
Next, we'll review some of the advanced options that are available for customizing the look and behavior of your slideshow.
Customizing the {CONTENT-SLIDESHOW} QuickCode Tag
As mentioned above, the {CONTENT-SLIDESHOW} QuickCode Tag can be used as-is to display a slideshow of content in your storefront. However, it can also accept several parameters, which can be used to customize its appearance and behavior. The available parameters include:
content-slideshow parameters
animation
Controls how each slide loads on the page.
Possible values: fade, horizontal-slide, vertical-slide, horizontal-push
Default: horizontal-push
animationSpeed
Sets the how fast each slide performs its animation while loading.
Possible values: The number of microseconds.
Default: 800
timer
Determines whether a timer is displayed in the upper-right corner of the image.
Possible values: true, false
Default: true
advanceSpeed
If timer is set to "true", then this determines the amount of time between slides.
Possible values: The number of microseconds.
Default: 6000
pauseOnHover
Determines whether the slide advancement is pauses while the mouse pointer is over the current slide.
Possible values: true, false
Default: true
startClockOnMouseOut
If set to "true", then the countdown to advance to the next slide will restart when the mouse pointer is moved off the current slide.
Possible values: true, false
Default: true
startClockOnMouseOutAfter
If startClockOnMouseOut is set to "true", then this value sets the length of the delay before the countdown to the next slide restarts after the mouse if moved off the current slide.
Possible values: The number of microseconds.
Default: 250
directionalNav
Controls whether left and right buttons are displayed on the side of each slide.
Possible values: true, false
Default: true
bullets
If set to "true", then bullet navigation will be displayed below the slides.
Possible values: true, false
Default: true
Passing parameters in the QuickCode Tag
Parameters can be passed within the QuickCode Tag in two ways.
Name/Value Pairs
The preferred method is to use name/value pairs. In this approach, both the name of the parameter and its value are included in the QuickCode Tag. This allows you to set custom values for any number of the available parameters, in any order.
example
For example, to set custom values for just the "timer" and "pause on hover" options, the QuickCode Tag would look something like this when using name/value pairs:
{CONTENT-SLIDESHOW:pauseOnHover=false:timer=false}
Note that when using name/value pairs, the parameters may be included in any order, and unused parameters may be excluded.
Values Only
Optionally, just the values of the parameters may be included. This can make the QuickCode Tag shorter in some cases, however, when including only the values of each parameter they must be kept in order.
example
For example, to set custom values for just the "timer" and "pause on hover" options, the QuickCode Tag would look something like this when using just values:
{CONTENT-SLIDESHOW:horizontal-push:800:false:6000:false}
Note that when using only the values, all parameters from the first one through the last one you use must be present and in the correct order.
don't leave space for spaces
Remember, a QuickCode Tag, including any included parameters, can not contain any spaces.
Correct: {CONTENT-SLIDESHOW:pauseOnHover=false:timer=false}
Incorrect: {CONTENT-SLIDESHOW : pauseOnHover=false : timer=false}
Incorrect: {CONTENT-SLIDESHOW:pause On Hover=false:timer=false}
Using the examples above, it is possible to add a content slideshow to any page of your storefront. The display of the slideshow can also be customized by including additional parameters in the {CONTENT-SLIDESHOW} QuickCode Tag.
|