|
Preparing the Template Package
After the template files have been completed, the next step is to upload the Template Package into my store. To do this, first create a zip file of the Template Package's directory.
 Create a zip file of the Template Package's directory.
zip it up right
Be sure to create a zip file of the entire Template Package directory. If you just select the individual template files and create a zip file of that, then the server won't be able to understand the directory structure of the zip file when it is uploaded. The installation of the Template Package will fail, and your friends will stop visiting for the holidays.
Uploading the Template Package
Once the zip file of the Template Directory has been created, use the Administration Area's Template Package management tool to upload and install it. By default, this tool is located in the Administration Area at: [Design > Template Package Sandbox].
In the Template Package Sandbox, click the Upload a Template Package option from the menu in the section of the page titled Select a Template Package. (See the example image below.)
Clicking Upload a new Template Package generates:
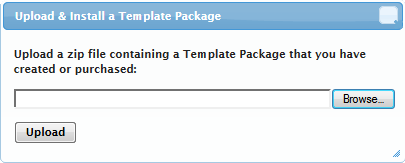
Click the Browse button to search your computer for the zip file you have created. Once you have located it, click the Upload button to import it. The shopping cart software will automatically upload and unzip the zip file, copy all of the Template Package’s files to the appropriate locations on the server, and then delete the copy of the zip file on the server. (Your original copy of the zip file on your computer will remain.)
Once the Template Package has been uploaded, several new options will become available in the Template Package Sandbox. (See example image below.)
related article
See the Template Package Sandbox knowledge base article for details on all the other options that are available in the sandbox.
Previewing a Template Package & going live
Before going live with my new Template Package, I can preview it in my storefront, by selecting the Preview link. This option will apply the HTML templates in the Template Package to the store on just my computer. To the rest of the world, my store will continue to display its current live Template Package. This is a good way to debug your templates before publishing them live to your publicly viewable storefront.
When I’ve finished previewing the new package, I can reset my web browser back to my actual live Template Package by clicking the Template Package Sandbox's Stop previewing link. (Note: I can also reset my web browser by closing it completely, and then reopening it.)
If I find any errors that need fixing while I’m previewing, I can use the Template Editor section of the sandbox to make corrections. Otherwise, I can select the Apply to storefront option, which will set the Template Package as my storefront's live Template Package. Now, all of the customers who visit my store will have the live Template Package used during their shopping experience.
|

