|
controlling different types of news
I several types of news messages, and I only want certain customers to see each one. For example, I have some general news that I want all my customers to see.
Next, I have some information that I only want displayed to customers that have a subscription to certain products in my store.
Finally, there's some private information that I only want shown to certain customers that I specify.
How can this be done?
There are several different ways to display various types of news to your store's customers. This article reviews how to display information to either all your customers, only those customers that have a subscription to a certain product, or only to a selected customer.
The Customer News section of the Customer Account Area
The Customer News page is one of the webpages in the Customer Account Area of the storefront, and by default is formatted into sections for the following three categories of Customer News: General News, Customer-Specific News, and Subscriber News.
The appearance and behavior of the Customer News page is controlled by the customer_account_4.tpl HTML template, if that template exists within the store's live template package.
If the customer_account_4.tpl HTML template does not exist, the universal template will be used instead. If the universal template is used, the Customer News page will display sections for all three categories of Customer News, and will display Subscriber News content, but will not have the capability of displaying content in the General News or Customer-Specific News categories.
In order to display content in the General News and Customer-Specific News categories, customer_account_4.tpl must be added to the template package, and must be customized.
tip The Populate tool of the Template Package Sandbox, which is located in the store's Administration Area at [Design > Template Package Sandbox] may be used to add customer_account_4.tpl if it is missing from the template package. The Knowledge Base article Using the Populate tool to add/create templates explains how to use the Populate tool to add missing templates.
General Design of the Customer News Page
The Template Editor, located at [Design > Template Package Sandbox], may be used to edit customer_account_4.tpl to produce the desired appearance in the storefront. Colors, images, fonts, and placement of page elements may all be adjusted.
General News
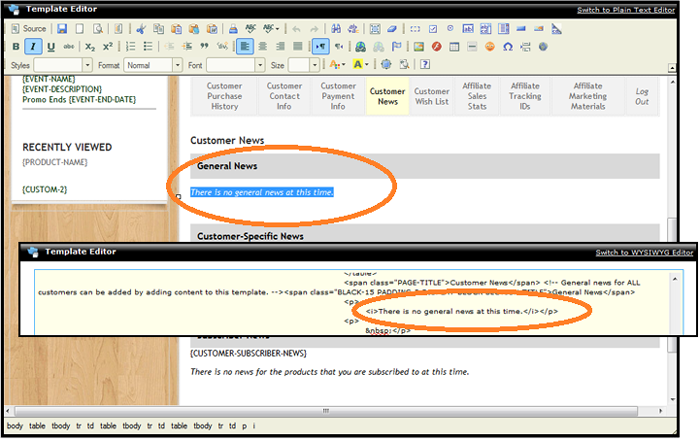
To add content for display in the General News section of the Customer News page, simply type the desired content into the General News section of customer_account_4.tpl.
Using the Template Editor, type the desired content into the General News section of customer_account_4.tpl,
replacing the default text of "There is no general news at this time."
Content entered into the General News section of customer_account_4.tpl will be visible to any customer who logs into their Customer Account Area of the storefront and views the Customer News page.
Subscriber News
To add content for display in the Subscriber News section of the Customer News page, simply open the relevant subscription product in the Product Editor and edit the Subscriber-Only Content option, in the Subscription Rules section. The Subscriber-Only Content option accepts HTML formatting, including images.
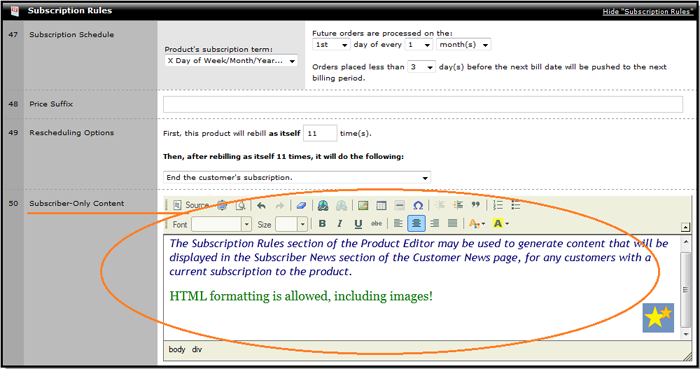 Whatever is entered in the Subscriber-Only Content option of the product's Subscription Rules will be displayed in the
Subscriber News section of the Customer News page for any customers with a current subscription to the product.
If a customer has multiple subscriptions, all Subscriber-Only Content that has been created for all of their subscriptions will be displayed in the Subscriber News section of their Customer News page.
Customer-Specific News
To add content for display in the Customer-Specific News section of the Customer News page, first create a custom Customer Field or Customer Attribute, then insert the QuickCode Tag corresponding to that custom Customer Field or Customer Attribute into the Customer-Specific News section of customer_account_4.tpl, and finally use the Customer Editor to enter the text that will be retrieved by the QuickCode Tag and displayed on the Customer News page.
key concept By default, Customer Fields are displayed to the customer at checkout and accept customer input, so using a Customer Field to display customer-specific news would allow the customer to be able to edit their own customer-specific news content.
Customer Attributes are not displayed to the customer at checkout and do not accept customer input, so using a Customer Attribute to display customer-specific news would prevent the customer from being able to edit the customer-specific news content.
It is possible to insert multiple custom QuickCode Tags into customer_account_4.tpl, so it would be possible to include both Customer Attributes and Customer Fields, to display some customer-specific news content that the customer would only be able to view on the Customer News page, and some customer-specific news content that the customer would be able to view and edit at checkout as well as view on the Customer News page.
The Knowledge Base Articles Customer Field Editor and Customer Attribute Editor explain how to create custom Customer Fields and custom Customer Attributes. Customer Fields or Customer Attributes to be used for customer-specific news content should be of the Text Field type.
Once the Customer Field or Customer Attribute has been created, the corresponding QuickCode Tag must be inserted into customer_account_4.tpl.
note The QuickCode Tags to display the name and content of a Customer Attribute are {CUSTOMER-ATTRIBUTE-TITLE:#} and {CUSTOMER-ATTRIBUTE-VALUE:#}, where # is the SID of the Customer Attribute. For example, to display the name of Customer Attribute SID 1, the QuickCode Tag {CUSTOMER-ATTRIBUTE-TITLE:1} would be used, and to display the value of Customer Attribute SID 1, the QuickCode Tag {CUSTOMER-ATTRIBUTE-VALUE:1} would be used.
The QuickCode Tags to display the name and content of a Customer Field are {CUSTOMER-FIELD-TITLE:#} and {CUSTOMER-FIELD-VALUE:#}, where # is the SID of the Customer Field. For example, to display the name of Customer Field SID 4, the QuickCode Tag {CUSTOMER-FIELD-TITLE:4} would be used, and to display the value of Customer Field SID 4, the QuickCode Tag {CUSTOMER-FIELD-VALUE:4} would be used.
After the Customer Field or Customer Attribute has been created, and the corresponding QuickCode Tag has been inserted into customer_account_4.tpl, the final step is to open the specific customer's record in the Customer Editor and type the news into the appropriate Customer Attribute or Customer Field, then click the Save Changes button at the bottom of the page.
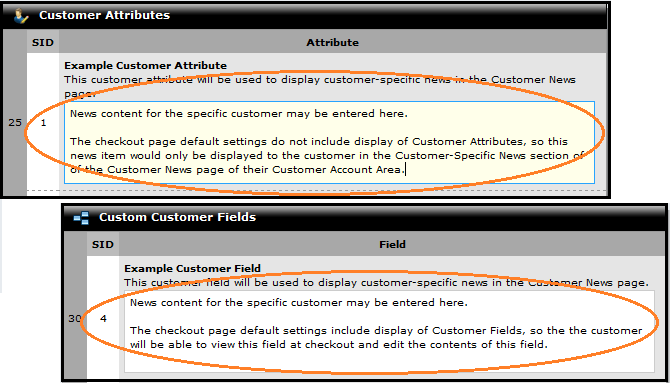
Enter the news content in the appropriate Customer Attribute or Custom Customer Field text area.
Click the Save Changes button at the bottom of the page when done.
Once the Customer Field has been created, open the specific customer in the Customer Editor. In the Custom Customer Fields section of the Customer Editor, locate the Customer Field that will be used for News content. Type the customer-specific news into the Customer Field text area. Click the Save Changes button at the bottom of the page to save the news item.
News content for a specific customer may be added by creating a Customer Field to contain the news, then inserting the appropriate QuickCode Tag into the customer_account_4.tpl HTML template.
|